I've recently become obsessed with using filters to enhance my photography.
Both On-camera Filters and Photoshop Filters.
ON-CAMERA FILTERS
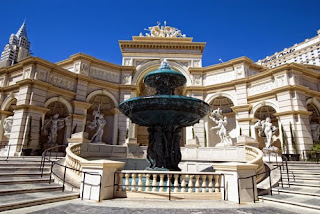
On-camera filters are rarely used anymore, even for Black and White photography as most digital cameras come with built-in features to turn your photos to b&w or sepia, to even enhance contrast and up the saturation. But two filters should be a must-have in every camera bag. One is a Polarizer which can cut down reflections on metal and glass. It can help even out nature shots by reducing reflections on water and sheen on vegetation. I use it alot when the sky is kind of hazy and dull. It can give a *punch* to the sky, making the blues richer. Here is an example where I used a Polarizer to achieve that blue sky:
The second on-camera filter I use is the Neutral Density filter. This helps control exposure on a bright day or when there is too much light reaching the sensor and you want to achieve a slow shutter speed. This was recently the case when I was in Las Vegas. Shooting night shots is a bit tricky because sometimes there is too much light coming from all the Neon glow around you. To help slow down the shutter speed I popped on my ND filter and was able to capture this image:
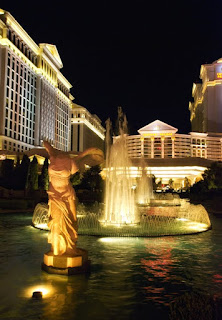
With this image, there were about 20 other people standing around flashing their bulbs at the fountain. That, along with light from the street and the fountain itself created a challenge with getting the shutter to slow down enough to capture the fountain and the golden light that was actually illuminating the area. Adding an ND filter cut down the amount of surrounding light and I was able to capture this image, keeping the mood and colors of the night intact.
Some photographers like to keep a UV Filter on their lenses at all times to help protect their lenses from dirt, scratches and damage. This one is a matter of personal preference. I don't use one as I feel it effects the outcome of the photograph but I know lots of photographers who never shoot without one and their images are still fantastic.
PHOTOSHOP FILTERS
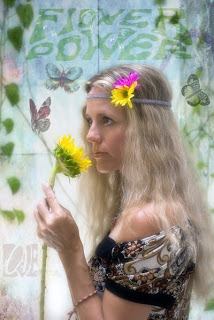
Here's where the real fun is! There are a gazillion photoshop filters out there and each one can create a unique look on your photograph. The following four images are all the same with the exception of having a filter added to the end result:
Here is the original, with no filter added:
This one has a Contrast Filter, upping the contrast between the highlights, shadows and colors:
By using the Contrast Filter, you can create a more even, professional look on your photo.
The third image show use of a Vintage Filter:

In this image, we can see how the Vintage Filter muted the colors and added a yellow tint, making it look like an aged photograph.
Finally, here is an example of one of my favorite filters the Fog Filter:
By using a Fog Filter and adjusting the Opacity, you can create a "dreamy" image, one that appears to have a soft focus.
These filters are plug-ins for Photoshop and there are many sites out there that offer free filter plug-ins as well as demos of filter software. Here are a couple:
http://www.cybia.co.uk/theworks.htm
http://thepluginsite.com/products/harrysfilters/index.htm
If you decide that Filters are for you, then it is definitely worth the purchase of a software that really gives you fantastic creative options, such as:
Mystical Tint Tone and Color 2.0 which has 60 filters creating over 300 preset looks:
http://www.autofx.com/products/mttc/detail.html
I hope you all enjoyed this tidbit on using Filters! Now, go get creative! :-)

 Thank God for Yoga.


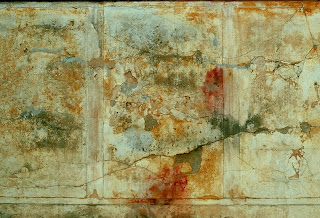
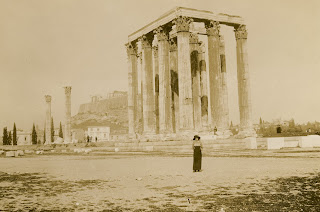 It's a fantastic find for a vintage photograph having a lone figure in front of this stunning monument. But, let's make it more interesting! One of the easiest ways to do that is to add a texture. You can find textures available anywhere..just look around..peeling paint? brick wall? pile of hay? You can begin to stockpile your own textures or visit a group like Textures for Layers on flickr and download some free textures but be sure to follow the rules of the original contributor regarding use of their texture and be sure to always give proper credit:
 When making a collage, there is no limit to how many images you can layer into it. I've seen digital collages with dozens of images compiled into one masterful piece. However, for "Exploration", I didn't want to distract too much from the original photograph so besides the texture I decided on just one other additional item. I chose a map from my own personal stock in keeping with the theme of travel and exploration:
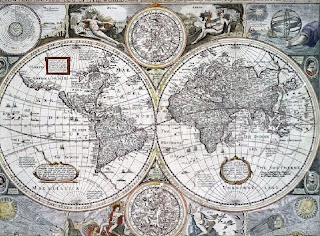 Now that you have all your images open in Photoshop, let's combine them using Layers.
 Ahh...traditional art. I so miss it. My time has been consumed these recent days with the newer medium of digital art. But that doesn't mean my love for the old ways has faded away. I still crave it at times. A quick oil study of some woods shows that I can still make time for traditional art. The image above took me just over two hours and although I am just a hobbyist at best, oil painting makes me *feel* like an artist.


 Playing games at my 9th birthday party

 18th Birthday


 Tween Day!
 Loran's Birthday

 The view of Siena from the bell tower
 Tween Day in Rome!


