Wednesday, February 24, 2010

Transitory Dreams

Yesterday the sun barely made an appearance.  But, at the end of day, it lit up my garden with the warm glow of last light.  I was closing the blinds on a bedroom window that looks out onto the Flame Vine and the light was bouncing off a dying bloom.  I stared at it for a moment or two entranced by the mixture of the golden light and the orange tint of the flower.  Then I hurried off to get my camera knowing that the ever so fickle light could be gone in an instant.  I knew I didn't have time to waste by putting on shoes, and going all the way to the garden.  I had to shoot it through the window, so shoot I did.  What I got was exactly what I saw, with the exception of the dirty film covering the window.  I really need to clean that window. However, the hazy look of the photograph appealed to me.  I added a texture and using earthy tones, I found myself creating an image that turned out to be more than I expected.  It was a moment captured, a moment that was now gone.


The light, the flower, my memory. These things are transitory, like dreams.

But I can always look back on this image and remember that last light, that dying bloom and my memory of it.


(Thanks to Missy for the signature idea!)

Saturday, February 20, 2010

Quad Collage Tutorial

Digital collaging is a great way to be expressively free in your art. You can piece together completely unrelated images and end up with a very unique work of art. However, collaging can be daunting as well, especially for those of us who can't decide between hundreds of images we've stockpiled in our computer files. Quad Collaging limits the pieces in a collage to just four, two images and two textures. By following the Quad Collage guidelines you can quickly create simple collages that still have a wow factor but eliminate the stress of trying to overlay tons of images onto your canvas.
There is only one rule in creating a Quad Collage and that is only four pieces are allowed. Pick from your files two random images and two random textures. You don't have to have a set idea in your mind, the goal of this tutorial is to just let it be completely free and open. So, are you ready to see just how easy it is to create a Quad Collage? Let's begin!
Image #1 is your bottom layer, or background layer and this is always going to be a photograph. Here I've chosen a birdbath...a throwaway shot...but wait, there is already a lot of great texture in it. Hmmm...maybe this would look good in a collage?
Image #2 is always going to be a texture. This is put as a layer on top of image #1. I'm using a text texture by Dark Yarrow. I really want the words to stand out so I'm going to set the blending mode to Multiply at 100%.
Image #3 is going to be your second photograph. This is layered on top of Image #2, your texture. I'm using this shot of the word "hope" found on a park bench. I want this strong so I set the blending mode to Multiply at 100% and go over just the letters with the burn tool. I also rotate this layer a bit so that the word is at an angle across the rest of the image. You can play around with each layer. Try rotating, scaling, different blending modes and change opacity.
The final image, image #4 is always going to be a texture. I've chosen this great texture called Exquisite Lace by Pareerica. I like how it's dark on the edges but light in the center. This is layered over image #3. I want this to be dark so I set the blending mode to Multiply at 100% and lower the brightness and change the hue to reflect more green.
My last step is to use a butterfly brush and add a butterfly into the very bottom corner to balance out the composition. Using brushes is a quick an easy way to add something to the image without breaking the Quad Collage rule of just four images. I adjust the saturation, hue and contrast until I am satisfied.
The final image: "Hope"
Even though you make think an image is not worth keeping, you may want to hang onto it for collage work. In collaging, there is no such thing as a bad picture! Create a file just for future collage work and stick your "less than perfect" pics in there.
Let's do another one using the same techniques. I've decided on this shot of a man walking down the street as my image #1.
Next is a texture layer. For image #2, I'm using the same texture as above, Exquisite Lace by Pareeerica. I will set the blending mode to Overlay to make the image lighter and brighter.
Next is image #3, another photo, this time of fall leaves. I actually took this shot on the same street as the man walking so why not use them together? I will set the blending mode to Multiply at 50% and using a brush at 100%, mask out the areas directly over my focal point of the figure. I don't want him completely covered in trees but rather a frame of trees around him.
The next step is another texture. For image #4, I picked out this antique map and set the blending mode to Multiply at 100%. I want this to be bold and noticeable in the final piece. Using a brush at 100%, I once again mask out the unwanted texture over the figure.
My final step is to convert the image to black and white. Collages don't always have to be in color and the adding of the antique map begged for this piece to be in black and white.
The final image: "Into the World Goes He"

What was just a couple of snapshots of the world around me has now become an interesting and thought provoking piece: "Where is he going?" "What adventures await him?".

Now that you've learned the simple steps in putting together a Quad Collage, I encourage you to create one, or two or several! Feel free to post them in the Fan Photos album on my Facebook Fan page so that others can be inspired by your work! Happy Collaging!

Saturday, February 13, 2010

♥Valentine's Day♥

♥A few of my images perfect for honoring Valentine's Day♥
♥My wedding set♥
♥A couple in love♥
♥Lovey, the duckling♥
♥Love♥
♥Heart♥
♥Key to my Heart♥

Wednesday, February 10, 2010

Serenity

When I think of Serenity, the same image always comes into my mind and it's not Frank Costanza from Seinfeld screaming "Serenity Now", although that is a close second.
Most of the time, the image in my minds eye is a 12th Century Monastery, built on a rock, surrounded by the wild sea. A place where ones mind is quiet and working hands scribe the words of God in illuminated texts. Monks roam long, silent cloisters and naves, lit only by the sunlight streaming through tall stained glass windows. Or by the golden glow of candles during evening prayers.
Perhaps, influenced by my stay on that secluded rock or by Loreena McKennit's song "Skellig" or maybe a combination of both, but when I light a candle, I think of peace, quiet, serenity. I think of my time on Mont St. Michel.
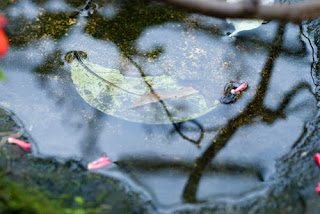
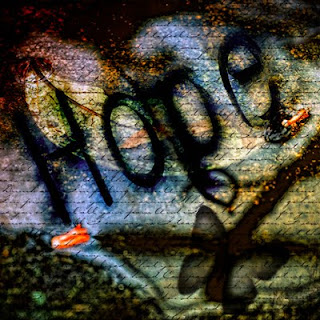
"Serenity" was the next Art Journal Journey prompt and although I began with grand plans for the next page of my journal, I ended up sketching something fairly simple...a few candles. The words from "Skellig" filling in the page, texture and paint added. I have candles lit now as I write. Calming, the soft sent of Rosemary and Musk takes me back to another time, another place, maybe even another life.
Closeup of the texture
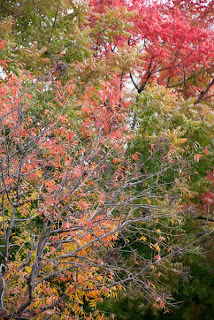
Finally, serenity also exists not only in the safe comfort of my own home, but also on my treks and journeys. Usually, it calls to my mind, long deserted roads canopied by whispering trees. Travelling miles on foot down the dusty pathways of old is a perfect way to quiet the mind of a city girl. :)
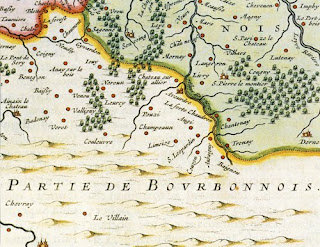
A Lonely Road in Wales
"The sole art that suits me is that which, rising from unrest, tends toward serenity."
-Andre Gide

Friday, February 5, 2010

Closeness Through Shared Activity

Closeness through shared activity. That was the theme this week which started on "Creative Saturday" with Lita. We've committed to our creative selves, when possible, three Saturdays a month: One for Photography, one for Digital Art and one for Traditional Art. It was a Traditional Art day...hands on, no computers. It was just us, some paints and supplies and a blank canvas. The goal: to create freely and let our hands take us on the journey, not knowing what our final destination was. Although I'm still working on my canvas, Lita finished her collage masterpiece which you can view in its final stage on her blog.
We had such a great time and are already looking forward to our next get together which will be a photography outing. It's been a long time since we went out together with our cameras.
The theme of shared activity continue to the middle of the week when I took Daniel on his first major audition! He auditioned for the role of Michael, Jennifer Aniston's son in her new movie "The Pretend Wife". With head shot and resume in hand, we headed down to North Miami Beach to Lori Wyman Casting.
It was like one of our date days but with a little bit of work in the middle. The work being Daniel's audition. He had to learn dialog which he had down pat. He was excited but calm, prepared but able to take direction and change the script when asked. When he went into the room to give his audition and they shut the door behind him, my heart started racing so fast and I was so nervous for him! I thought I was going to pass out or have a heart attack. He did great and even though it's a million to one shot, we had a great time together and he gained some valuable experience.
This week's theme concluded with Loraine and I heading down to Miami for a day of shopping, lunch, conversation and of course, Starbucks. I love those girly shopping days with Loraine. It's always very relaxing and she's really good at finding the best deals!
We went to Anthropology and I took a few shots including the one below which I titled "Time Turners". I'd like to think these interesting knobs have some magical properties to them. I think I may just have to get some next time! How I love that store.
Speaking of photography, it was a great week as I licensed the following image which will be used in a poster for a Country & Western Musical Festival in Dublin, Ireland!
This image is going to be used by the Somerset, England Heritage Committee in their 2010 Travelling Booklet!
And the company that licensed my Christmas Gargoyle (which I got my royalty check for last month...that was exciting!) purchased this image to be used in the future on architectural cards.
One final update on the gardening: The Forget-Me-Nots and the Lupines have sprouted! The squash are growing rapidly and a new little baby Cassia tree has popped up in the garden.
Looking back on the week, it was certainly filled with creativity, excitement and friendship. All weeks should be like this!