

Daniel and I share a love of books and Fantasy...we love Lord of the Rings and Harry Potter.
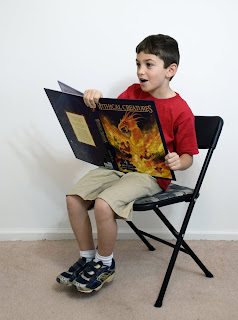
So, on one of our "date days" we headed to the bookstore. An oversized kids book called "Mythical Creatures" caught my eye and an idea for a digital piece began to form.
I like to gather all the images for my pieces first...sometimes when I have them all open I realize they don't work together. Doing this step first helps me to visualize where everything is going to be placed into a scene, how the lighting and color is in each image and whether or not it will blend together.
I chose a forest for the background. After searching my travel stock, I settled on this image of a sunlit forest taken during my trek of Hadrian's Wall in Northumberland. Working on the background required adding in some additional trees to fill in some spaces and cloning out the branches on the ground and cloning in additional grass.

I next cut out the photograph of Daniel and a stock image of a tree stump and place both into their own layers. More work on the grass is done around the tree stump. Depth is created by using various shades of green.
At this point in the process, I add a Curves Adjustment layer to darken the background layer and take away some of the light coming through the trees. Knowing where I am going to place the dragon, I go ahead and create a shadow on the grass under where he will be. This is done using a grass brush in a deep dark green and adding the effect of a Drop Shadow. This way I get more depth than just using the burn tool.
A stock photo of a broken egg is cut out and placed into the grass. More grass work is done around the egg and additional areas of the image..pretty much until I'm satisfied. :)
I next created the glow by using Photoshop brushes found on DA and clicking the colorize box on Hue/Saturation and adjusting until I found a color I liked and that fit in with the rest of the image. Now it was time to add the dragon.

Searching stock photos, it took me some time to find one that I could work with. The difficulty was finding one that had the head in the right position. Everything else I could manipulate using the Warp Tool which I did as you can see in the final image. I also wanted to change the color, contrast and texture of the dragon. All of these things were achieved using standard Photoshop adjusments. I placed in a Curves Adjustment Layer to add a bit more overall darkness to the entire image and used High Pass Sharpening to sharpen areas of the Daniel and the Dragon.
I then copied the Glow Layer and place the copy above the dragon, lowering the opacity so that the dragon seems to be coming out of the glow instead of just in front of it. I erased the areas I didn't need and in addition erased some of the dragon using a Layer Mask on the dragon layer to bring the glow through and around the dragon.
Lastly, I flatten the image and run a filter over it to cross balance the color and give it a warmer glow. Viola! A child's imagination come's to life! :)

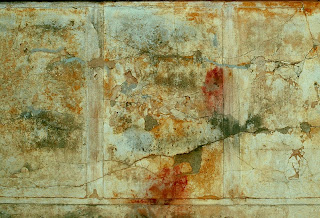
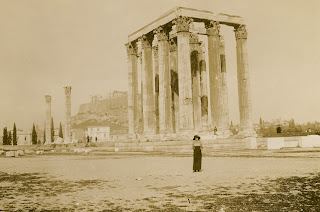 It's a fantastic find for a vintage photograph having a lone figure in front of this stunning monument. But, let's make it more interesting! One of the easiest ways to do that is to add a texture. You can find textures available anywhere..just look around..peeling paint? brick wall? pile of hay? You can begin to stockpile your own textures or visit a group like Textures for Layers on flickr and download some free textures but be sure to follow the rules of the original contributor regarding use of their texture and be sure to always give proper credit:
 When making a collage, there is no limit to how many images you can layer into it. I've seen digital collages with dozens of images compiled into one masterful piece. However, for "Exploration", I didn't want to distract too much from the original photograph so besides the texture I decided on just one other additional item. I chose a map from my own personal stock in keeping with the theme of travel and exploration:
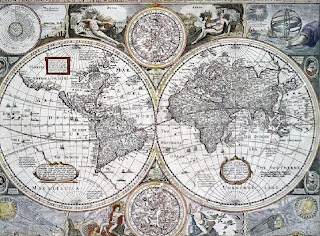 Now that you have all your images open in Photoshop, let's combine them using Layers.