
Digital collaging is a great way to be expressively free in your art. You can piece together completely unrelated images and end up with a very unique work of art. However, collaging can be daunting as well, especially for those of us who can't decide between hundreds of images we've stockpiled in our computer files. Quad Collaging limits the pieces in a collage to just four, two images and two textures. By following the Quad Collage guidelines you can quickly create simple collages that still have a wow factor but eliminate the stress of trying to overlay tons of images onto your canvas.
There is only one rule in creating a Quad Collage and that is only four pieces are allowed. Pick from your files two random images and two random textures. You don't have to have a set idea in your mind, the goal of this tutorial is to just let it be completely free and open. So, are you ready to see just how easy it is to create a Quad Collage? Let's begin!
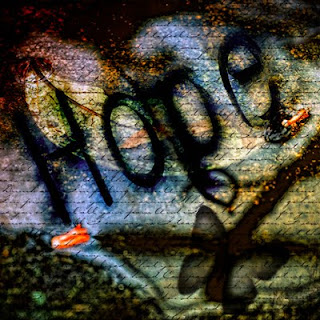
Image #1 is your bottom layer, or background layer and this is always going to be a photograph. Here I've chosen a birdbath...a throwaway shot...but wait, there is already a lot of great texture in it. Hmmm...maybe this would look good in a collage?
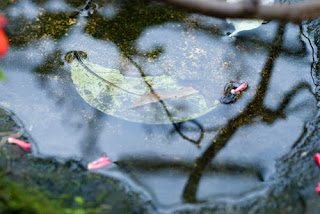
Image #2 is always going to be a texture. This is put as a layer on top of image #1. I'm using a text texture by Dark Yarrow. I really want the words to stand out so I'm going to set the blending mode to Multiply at 100%.
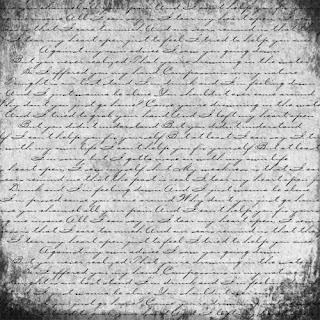
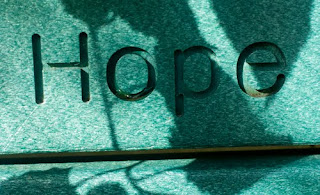
Image #3 is going to be your second photograph. This is layered on top of Image #2, your texture. I'm using this shot of the word "hope" found on a park bench. I want this strong so I set the blending mode to Multiply at 100% and go over just the letters with the burn tool. I also rotate this layer a bit so that the word is at an angle across the rest of the image. You can play around with each layer. Try rotating, scaling, different blending modes and change opacity.
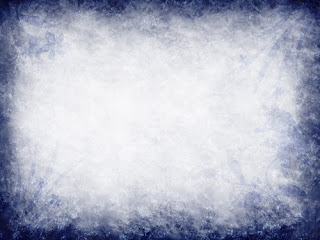
The final image, image #4 is always going to be a texture. I've chosen this great texture called Exquisite Lace by Pareerica. I like how it's dark on the edges but light in the center. This is layered over image #3. I want this to be dark so I set the blending mode to Multiply at 100% and lower the brightness and change the hue to reflect more green.
My last step is to use a butterfly brush and add a butterfly into the very bottom corner to balance out the composition. Using brushes is a quick an easy way to add something to the image without breaking the Quad Collage rule of just four images. I adjust the saturation, hue and contrast until I am satisfied.
The final image: "Hope"
 Even though you make think an image is not worth keeping, you may want to hang onto it for collage work. In collaging, there is no such thing as a bad picture! Create a file just for future collage work and stick your "less than perfect" pics in there.
Let's do another one using the same techniques. I've decided on this shot of a man walking down the street as my image #1.
Next is a texture layer. For image #2, I'm using the same texture as above, Exquisite Lace by Pareeerica. I will set the blending mode to Overlay to make the image lighter and brighter.

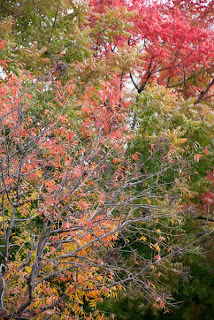
Next is image #3, another photo, this time of fall leaves. I actually took this shot on the same street as the man walking so why not use them together? I will set the blending mode to Multiply at 50% and using a brush at 100%, mask out the areas directly over my focal point of the figure. I don't want him completely covered in trees but rather a frame of trees around him.
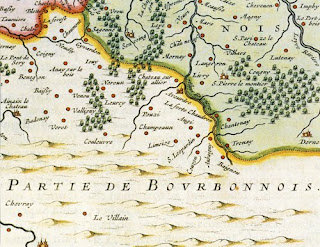
The next step is another texture. For image #4, I picked out this antique map and set the blending mode to Multiply at 100%. I want this to be bold and noticeable in the final piece. Using a brush at 100%, I once again mask out the unwanted texture over the figure.
My final step is to convert the image to black and white. Collages don't always have to be in color and the adding of the antique map begged for this piece to be in black and white.
The final image: "Into the World Goes He"

What was just a couple of snapshots of the world around me has now become an interesting and thought provoking piece: "Where is he going?" "What adventures await him?".
Now that you've learned the simple steps in putting together a Quad Collage, I encourage you to create one, or two or several! Feel free to post them in the Fan Photos album on my Facebook Fan page so that others can be inspired by your work! Happy Collaging!
6 comments:
You make it sound so easy.
I must try the collage folder for 'less than perfect' prints. First I need a new expandable hard-drive.
Oh wow, Laura! What a user-friendly, no-pressure way to approach a new layered piece. And what's fun, is you have no idea how it will turn out until the end (like our recent painting exercise). Fantastic and helpful tutorial, and thanks for sharing! Speaking of tutorials, I found mine for the next time we do them together :)
What an interesting photo! It really appeals to me. Will you be posting it @ LKG photography? I would like to order a print:)
Thanks Doug! I loved your first attempt! Keep it up!
Thanks Lita! I can't wait until we get together to do a tutorial! I still need to pick one out. :)
Thanks Alex! The image is up at my site!
Oh, Laura! This blog entry is incredible! I love the collages. What Photoshop program are you using, if you don't mind my asking? If you recall, I only have "Photoshop Elements 6". Still trying to learn it! Is this something that I can do with Elements 6 or not?
I am loving the beautiful "Alyss" book, my friend! Thank you again. So very thoughtful of you.
Your new signature looks great!!!!! Isn't that just a classy touch to your blog?!!!! Love it!
Have a great day, hugs....Missy
Hi Missy!
Thanks so much! I use both Photoshop Elements 5 and Photoshop CS3. You can totally do this with Elements 6. I have lots of textures available too if you want to use any:
http://lausanne.deviantart.com/gallery/#Textures-and-Backgrounds
So glad you love the Alyss book and Yes, thanks for the signature idea...I love it!
Hope you have carved out some creative time this week!
Love ya!
Post a Comment